Laser Rotary Attachment
Revision as of 04:33, 17 March 2025 by Neil.gabriel (talk | contribs) (→Lightburn Sofware Setup: updated section)
Contents
Purpose
(UNDER REVIEW) The rotary tool for the Rabbit (80W) laser allows for the cutting/engraving of roughly cylindrical objects such as beer glasses, tubes, flashlights, etc. There are actually two rotary tools, one with a drill-like chuck, and one with roller wheels on which the object to be marked rests. This tutorial is for the latter.


Process
Rotary Tool Setup
- Locate the rotary tool next to the laser PC by the pay box.

- Turn on the laser, and lower the bed 6 inches or so. Taking care to ensure that there is nothing below the bed that will be in the way of this movement.
- Place the rotary tool on the honeycomb with the motor end to the right. Square up the tool using the honeycomb holes.
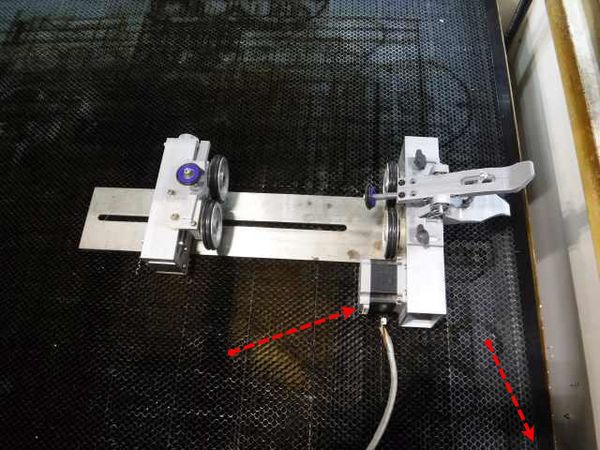
- Locate the Rotary Tool cable (red arrows in picture above) in the front right inside corner of the laser and plug it into the motor of the Rotary Tool.
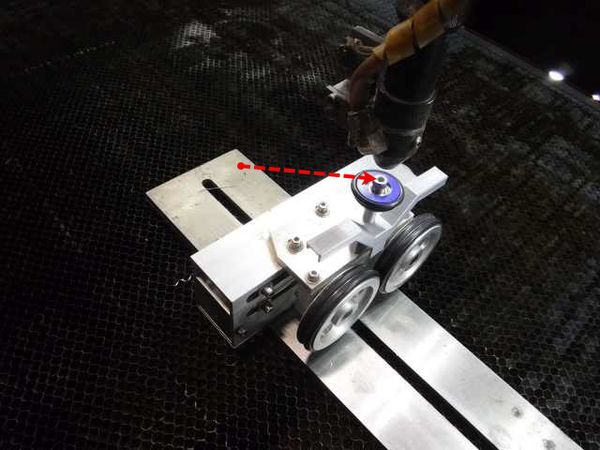
- Using the control panel arrow buttons, move the laser in the Y axis until it is directly over the center of the rotary tool and press the ORIGIN button on the control panel.
- After you perform the following steps, you will not be able to move the gantry in the Y-axis using the control panel up and down buttons, so get it where you want it now.
- TURN OFF THE LASER WITH THE KEY
- Place the Rotary/Normal rocker switch in the Rotary position.
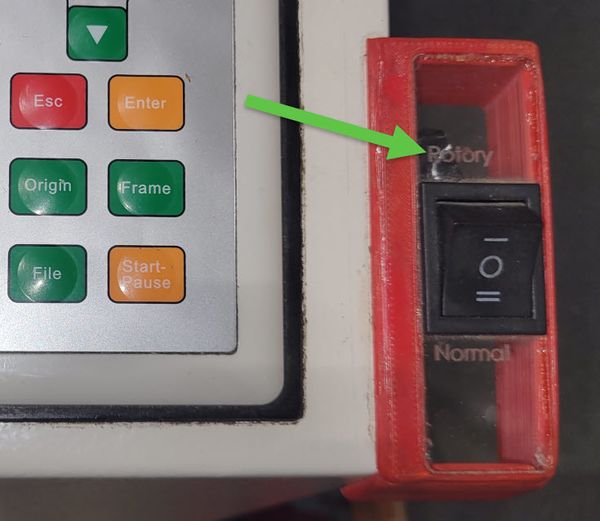
- You may now turn the laser back on.
- Once the laser starts up, it will find the origin in the X-axis, but will not move in the Y-axis. The rotary wheels should instead spin.
- When the laser is ready, you should be able to rotate the rotary wheels with the up and down buttons on the key pad.
- NOTE: The side of the rotary tool with the motor attached should be on the right side, otherwise the up/down buttons (and your artwork) will be backward.
- Now we want to make sure that the travel in the Y/rotary axis is correct.
- Manually move the gantry back out of the way. It will move freely front to back since the Y motor is not on. If it does not freely move, re-check the switch position in step 7.
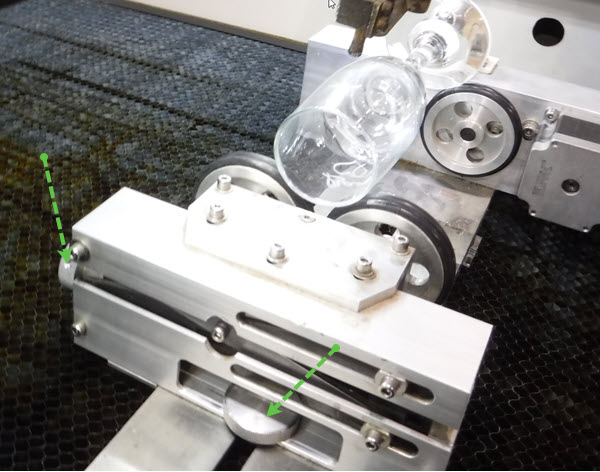
- Place your work piece on the rotary wheels.
- NOTE: the heaviest part of your work piece should be placed on the wheels on the right side of the Rotary unit.
- Jog forward and backward with the up and down arrow on the key pad, to make sure the material doesn't "walk" to the left, and off the wheels.
- The left (non-driven) set of wheels can be raised/lowered via the wheel in the back (level the work piece engrave area), and slid left/right by loosening the knob on the left.
- Manually move the gantry over the center of the work piece and use the left/right arrows on the control panel to put the laser in the center of your engrave area.
- NOTE: Lower the bed using the Z axis to ensure the laser clears the work piece.
- Using the Z/U key on the control panel, select Auto-Focus and enter.
- Once you have the laser centered and focused, press ORIGIN on the control panel.


Lightburn Sofware Setup
A short LightBurn tutorial part 1 is available here.
part 2 is available here.
PUT IT BACK AS IT WAS
After etching/cutting your design, make sure to put everything back (both software and hardware) so the next person isn't confused.
- Disconnect the Rotary cable on the motor and return it to the front inside of the laser.
- Place the Rotary/Normal rocker switch in the Normal position.
- Return the Rotary Unit to its storage location
- Raise the bed, test that both X and Y-axes move as expected and move to the right rear corner. Press ORIGIN to save the zero location.