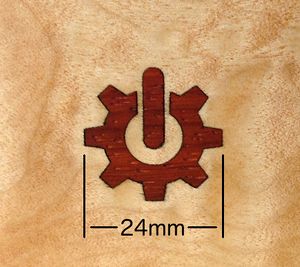
Laser Cut Inlay
This guide explains a method of adjusting a drawing to account for the kerf (the width of the cut).
Contents
Calibrate[edit]
Each material and combination of speed and laser power will produce cuts of differing widths. You MUST do some test cuts and engraves in samples of your actual materials. Choose a convenient dimension such as 5 mm or 10 mm. Record your speed and laser power settings for reuse later.
Measure the kerf for inlay cuts[edit]
Cut a small test sample of your actual inlay material. Record your settings! Ensure that each edge you will measure has been cut by the laser (i.e. don't measure from a stock cut side to a laser cut side). Carefully measure the result with calipers and subtract the measurement. For example 10 mm test measuring 9.92 mm has a kerf of 0.080 mm (80µm).
Determine settings for proper depth[edit]
Engrave a small test recess into a scrap of your actual material. Record your settings! Measure the depth, adjust settings and repeat until the depth measures slightly less than the thickness of your inlay material. Be sure to record your final settings!
Drawing preparation[edit]
The drawing must consist of solid vector shapes. Set the fill and remove the stroke, then size to actual dimensions. (Measurements in Inkscape include the line/stroke thickness.) You cannot simply scale the drawing later as doing so would scale the kerf adjustments too. Also, you may want to set the drawing to a known size, such as fit to objects plus 5 mm margin on all sides.
Create inside and outside shapes[edit]
We'll use the shapes' own stroke width to create cutting paths with proper inside and/or outside dimensions. The inlay cuts will be oversized by the kerf measured above, and the recess will be undersized. In this example we will exaggerate the adjustments for the sake of illustration (+0.75 mm and -0.25 mm). Use your own measurements in your drawing.
In this method we will export the drawing as a raster, import the raster, then use the Trace Bitmap feature to convert it back to a vector shape. It's not perfect, but this method seems to work well in practice.
work in progress
Enlarge shapes for inlay[edit]
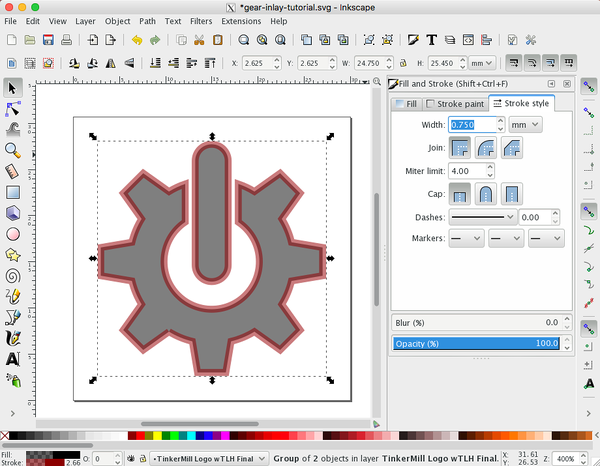
- Select your object by clicking on it. Go to the Object menu, Fill and Stroke. In the tool shelf select Fill, choose Flat color and change the color to black. In Stroke paint choose Flat color and change the color to black. In Stroke style set the stroke width to 0.75 mm.

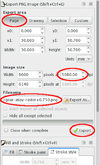
- Go to the File menu, Export PNG Image. (This does not open a standard file dialog, but rather the tool shelf.) Choose Page in Export area. This will make it easier to align when we import the raster image. Set the dpi under Image size to 5080 dpi. Choose a filename and make sure you know which directory it's in. Click Export and close the tool when done.
- To help discern the original object from the raster, remove the fill color by choosing No paint and set the stroke width to something small like 0.05 mm.
- Go the the File menu, Import and find the file you exported. The default options are ok. Click Ok.
- With the raster image selected, go to the Object menu, Align and Distribute. Choose Relative to "Page". Align the raster image to the center, both horizontally and vertically.
- With the raster image still selected, go to the Path menu, Trace Bitmap. Use the Single scan, Brightness cutoff method. Deselect smooth (?). Click Ok. A new vector object will be generated and will be selected.

- Again, to help discern object from one another, on new object remove the fill color by choosing No paint, change the stroke color to blue, and set the stroke width to something small like 0.05 mm.
- We're done with the raster image. Select it and delete it.
Shrink shapes for recess[edit]
The procedure for the recess is nearly the same as for the inlay, except the initial stroke width is different and the color is set to white (to match the background).
- Select the original object (in black), set fill to black and stroke to white, and stroke width to 0.25 mm.

- Export to png (raster). Choose a different filename!

- On the original object remove fill and set stroke width to something small.
- Import raster image.
- Align the image to page.
- Trace Bitmap

- On new object, remove the fill and set the stroke color and width to something small.
- Remove the raster image.
Result ready to cut[edit]
