Difference between revisions of "Mitek training"
| Line 6: | Line 6: | ||
Operating envelope: | Operating envelope: | ||
| − | * Y: | + | * Y: 16 inches |
| − | * X: | + | * X: 30 inches |
| − | * Z: | + | * Z: 20 inches |
Max spindle speed: 4000 rpm | Max spindle speed: 4000 rpm | ||
Revision as of 10:57, 2 February 2023
The Mitek CNC Mill is an excellent tool for general purpose milling of any machine shop compatible material including plastics, aluminum, steel, stainless steel.
There is no woodworking permitted in the machine shop. If you would like to CNC mill wood, use the Shopbot.
Contents
Mitek Physical Specifications
Operating envelope:
- Y: 16 inches
- X: 30 inches
- Z: 20 inches
Max spindle speed: 4000 rpm
Uses NMTB40 tooling.
The machine shop is stocked with fixed size tool holders and ER collet tool holders. We use ER25 collets and have metric (up to 16 mm) and imperial sizes (up to 5/8") available.
Mitek Training
Mitek training costs $150. Exceptions will be made for those wishing to learn but for whom that fee represents a hardship. Contact Shakeel on Slack.
The CNC machining skills you will learn by the end of the training:
- An easy to learn way to manufacture parts which require multiple types of tooling (This can be cumbersome for complex parts and can reduce your precision. It is generally possible to make metal parts to within 0.015 inches using this method if you are careful. More advanced users may elect to figure out how to manage tooling in the CNC software.)
- Adapting drawings for the CAM process.
- Mounting complex shaped parts on the CNC without the need to make soft jaws.
- Managing coolant and lubrication on the CNC
- Listening to the CNC to know how to modify your pre-programmed machining process on the fly
Prerequisites
The Mitek is in concept an automated version of the Bridgeport manual mill, however the dangers of using the Mitek are amplified. To be trained on the Mitek, you must have completed a Machine Shop 101 course on the mill and received an endorsement from the instructor.
You should own your own cutting tools that you will use during the training, though the instructor should also have them available. Cutting tools can be made from any material appropriate for your application. For example, if you only ever plan to use the Mitek to cut plastic get whatever tooling is cheap and make your certification part from plastic instead of aluminum. Shakeel really likes the endmill set sold by Harbor Freight which is priced competitively and has stood up to plenty of aluminum and steel machining on the Mitek and the Bridgeport. Carbide tools are great, but they're expensive and easy to break on the CNC where you won't get a lot of force feedback letting you know that you're feeding too fast. Roughing endmills are also great. Recommended cutting tools:
- 1/4" endmill
- 1/2" endmill
- Center drill appropriate for a 17/64" drill
- 17/64" drill
This course uses an aluminum plate 4" x 4" x 1" to make the part from (rough cut provided by the instructor, do not count on the provided stock being exactly this size). A smaller plate can be used, but for learning purposes make sure that your cut depth for making the logo is half the thickness of the plate. If you make the lateral dimensions of the plate smaller, ensure that you have a sufficiently small endmill that will fit in the slots that need to be cut. Your endmill should be at least 25% smaller than the slots you are attempting to cut in this part.
Software
The Mitek operates using a digital instruction set that must be pre-programmed into the machine before you begin. This is colloquially known as G-code. G-code is almost never manually programmed from scratch and is typically generated from CAD software packages in combination with CAM tools. CAD tools will allow you to create a drawing of a part, CAM tools will allow you to generate the step-by-step instructions for CNC tools to make the part.
You have two options for CAD/CAM packages for this course.
Solidworks as the CAD package is available with a free license through Tinkermill with the free HSMXpress add-on acting as the CAM tool. While Solidworks does include an integrated CAM tool, it does not have a free post processor which is compatible with the Mitek (the post-processor is a file which provides instructions for the CAM tool with how to communicate with the CNC). HSMXpress is limited to 2.5D parts machining. HSMXpress includes the HSM Edit tool which allows you to manually edit G code and is easily able to upload G code to the Mitek.
The other available option is Fusion 360, for which you can obtain a free license for personal or small business use. Fusion 360 uses the full HSMWorks CAM engine HSMXpress is based on and is able to do full 3D machining. For some users, this may be a better long term option as long as you can surmount some of the technical challenges of uploading the G code to the Mitek. You will need to download PuTTY to upload G code to the Mitek. HSM Edit is not available with Fusion 360 unless you own the full copy of HSM Works or Autodesk Inventor.
You can use the standard Vickers Acramatic postprocessor bundled with HSMXpress. Richard Warner has a custom post processor that he wrote for the Mitek but Shakeel has not tested it yet.
If you have other tools which you prefer to use for CAD or CAM you are more than welcome to do so, however the ability of the course instructor to provide support may be limited.
Users have experienced syntax errors when transferring G-code from MacOS computers to the CNC. The exact same G-code transferred from Windows has avoided these syntax errors. Using a Windows computer for the file transfer is therefore recommended.
Getting trained on the Mitek
The procedure for getting trained on the Mitek begins with a self-directed and ends with a training on how to operate the Mitek and the manufacturing of a demo part.
Self Directed Component
Drawing of Part Being Made
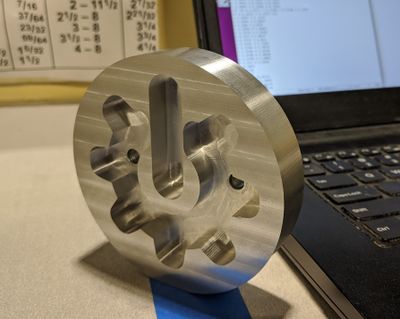
The purpose of the self directed component of the training is to familiarize yourself with CAD and CAM software tools. At the end of the Mitek training, you will have made a version of the Tinkermill logo out of aluminum. You can obtain the 3D model for the Tinkermill logo cut into aluminum here. LINK TO FILE. The goal of the self directed component is that at the end, you should have a full set of CAM instructions and manufacturing steps to make this part.
To manufacture this part, you must perform the following operations:
- Mill the logo into the aluminum block
- Drill the mounting holes for the jig plate into the part
- Use an endmill to remove the excess material from the stock
- Face the final part with an endmill.
This part will be made in 2.5D, which is a limitation imposed by HSMXpress. 2.5D means that your part must generally be conceptualized as a stacked series of 2D surfaces. 3D CNC machining is possible on the Mitek but requires a capable software package (such as the paid version of HSMWorks, the built-in Solidworks CAM tool, or Fusion 360).
CAM Tutorials
The following are useful tutorials I have found on how to use HSMXpress in Solidworks (please add resources to this list as you discover them):
https://www.youtube.com/watch?v=gvdqKvPLDok - This is produced by the company which makes HSMXpress and is a very good overall video to understand the workflow
https://www.youtube.com/watch?v=fxO0Y9zaodc - This detailed series of videos will walk you step by step through process.
Changes to Part Drawing
Note that you will have to modify the provided drawing to be appropriate to your cutting tools. As a general rule, the radius of curvature of any corners you make while cutting into a part should be at least 13% bigger than the endmill. This prevents the metal being cut from grabbing onto the part which can cause the part to move, excessive tool wear, and in extreme cases for the part and your tool to bind. To manage the tool change process on the Mitek, you should structure your CAM instructions as separate "jobs" (Solidworks) or "setups" (Fusion 360). Each job should use only a single tool (e.g. a 1/4" endmill, or a center cutter). Each job will be exported from your CAM software as a separate file. Tool changes take place between files, allowing/requiring you to redefine the zero point (where zero on the part is, and also the length of your new tool) for the new tool manually between each step. This can be avoided by learning how to use the programmed tool library in the CNC.
Unless you have a good reason to do otherwise, you should plan for the part to be done with climb milling. This permits better tool engagement and control on the CNC. While you typically avoid climb milling on a manual mill, it is preferred on the CNC.
Part Fixturing and Working Coordinate System
To avoid making soft jaws for the final profiling step, we will be using a fixture plate. A fixture plate is a plate to which the part we are manufacturing can be bolted to. This could possibly be done by simply bolting the part to the T-slots of the work table, but is not worth the risk of damaging the table. The fixture plate is made from aluminum and is considered a sacrificial part to cut in to. Here is a good general purpose overview of workholding options for CNC. Here is an excellent tutorial on the use of a fixture plate to make the outer contour of oddly shaped parts. For this course, plan to hold the fixture plate in the machine vise. The fixture plate will be provided by the course instructor.
There's a little bit of philosophy in defining the WCS. What we're going to be doing is giving each tool a "job"/"Setup" in the CAM software so that the Mitek will allow us to touch off at every tool change. So the workflow will be something like starting with a 1/4" endmill to mill out the logo, then switching to a center cutter to start the through holes, and then using a drill to complete the holes. Before each cutting operation, we need to be able to tell the Mitek where the cutting tool is relative to the part. If you use the tool library you pre-load your code with all the tool lengths so that the whole thing is one continuous job and the Mitek will always know where it is relative to the workpiece because you touch off before the first cutting operation.
If you build your CAM steps as all a single job, the Mitek will prompt you to change tools but WILL NOT allow you to touch off of the workpiece. For this training because our tool lengths are unknown (and will be subject to how exactly we mount them in the collet), we export each tool as a separate job.
By exporting as separate jobs, the Mitek will let us touch off each tool, thereby allowing us to define where that tool is in space every time we change tools. So preferably, we do all the steps that use the 1/4" endmill at the same time, then all the drilling at the same time, so we only have to touch off each tool once. When you touch off on tool changes, what you'll be doing is literally entering coordinates that the Mitek is at relative to the (0,0,0) of the WCS you define for each job. This is important: You will need to define a WCS for EACH JOB and it can be different. Use that to your advantage. So the easiest coordinates to enter are typically (0,0,0), and so you'll want to set the origin of your WCS to be a place that will be easy to touch off of.
That won't quite work here because our stock is 2.54 cm thick but the finished part we're aiming for is 2 cm thick. So if you mount a 1/4" endmill and set your WCS origin to be the center of the top surface of the stock and your part is designed to be at the top of the stock, you're going to have to add an operation at some point to flip the part over and face it down 0.54 cm. That's a lot of extra steps, not to mention a real killer for accuracy.
A better option for the logo engraving step might be to set your WCS origin to be somewhere on the top surface (probably not a corner since you can't guarantee that the stock will be exactly the right size) and put your part in the bottom of the stock. The 1/4" endmill will have to do a little extra work cutting deeper slots, but then you can take off the extra material at the very end with a 1/2" endmill and face down the extra thickness. Or you could set up your coordinate system the exact same but have the first step be cutting the stock to the correct thickness. This is probably the right thing to do from a machining standpoint, but will add an extra "job" to the CAM and add an extra touch off that you need to do. There are many others that may occur to you while designing your CAM steps, do whatever you think will work for you.
The Mitek is dumb when it comes to units. It will believe that any instructions it receives are in inches. Make sure when you export your G-code that your software and drawing is set to inches and not metric otherwise your Gcode will be exported in the wrong units and the Mitek will happily cut you a 10 inch slot instead of a 10 mm slot.
Once you believe you have a series of CAM steps programmed which will make the part, contact Shakeel on Slack and send him your file. Shakeel can accept either Fusion 360 or Solidworks files. Send files to Shakeel using the original program format to preserve the CAM instructions. Shakeel will provide feedback, and if you are done, he will schedule you for the second part of the training.
Mitek Operating Procedure
The Mitek is a much more complicated machine than either of the manually operated mills. This section serves primarily as a reference for trained users and IS NOT A SUBSTITUTE FOR TRAINING. Do not try to figure out how to use the Mitek on your own, it can be EXTREMELY DANGEROUS.
The Mitek has two spindle gears, a high and low speed. The low speed gear goes from 0 RPM to 400 RPM. The high speed gear goes from 401 RPM to 4000 RPM (the maximum spindle speed of the machine). Any step which requires you to switch gears will prompt you to do so without requiring a separate job, or without needing to be programmed into your CAM steps.
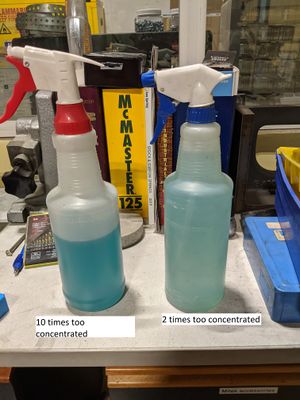
You must manually provide coolant and lubricant to your part while it is being machined. This is done using a Koolmist water-based product from a spray bottle. Under absolutely no circumstances should you ever do anything that involves reaching near the cutting tool while it is operating, including to lubricate or clear chips. Keep an air pistol or shop vac with wand handy if you expect to clear chips while a cutting operation is occurring.
- Badge in to Tinker Access
- Make sure Mitek is plugged in and not Supermax
- Turn on the power to the Mitek

- Wait for computer to boot up
- Use this time to prepare your physical setup. Get a shop vac handy if you plan to use one, prepare the coolant/lubricant bottles, get an air pistol.
- Clear any objects which may be sitting on the ways
- Once computer turns on, clear the axis error compenstation alarm and the axis error compensation increment alarm.
- The system status area of the Mitek home screen will say “Machine Power Required”. Press green button below control display. You may need to press the green button multiple times before it changes to "Axes are Unaligned". Ensure that nothing is in the way of the machine table or spindle moving through it’s full range of motion (e.g. cables, pneumatic tubes, stuff sitting on ways etc)

- Next message in the system status area: “Axes are Unaligned.” We need to home the table and the spindle so that the machine will know where it is, this is done by taking the machine through its full range of motion. While holding pendant in hand press “Align” when alignment display comes up press and hold F1 (AXES ALGN) while observing machine. If AXES ALGN is not the option under F1, press the (MORE ==>) button to toggle between the displays. If anything is about to fall or become pinched, release F1 move the object and resume. If table movement is slow you may need to increase the hand wheel increment (Hand Wheel -> Use the F buttons to increase the increment). Computer will now say that axis is aligned.
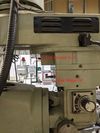 Before operating the Mitek, check the grease port of the spindle and add lubricant using the grease gun if appropriate. You cannot over lubricate, but you can run the spindle dry and destroy this tool. Be sure to put the right lube in the right place.
- You are now ready to load drawings and parts.
- Press Align again on the pendant to leave the alignment controls.
- Using the Z controls on the pendant, lower the head and install your first cutting tool.
- To move the machine using the hand wheel, on the pendant press the "Hand Wheel" and select the relevant axis (X, Y or Z). The speed is controlled using the increments which can be selected using the Function buttons (F1, F2, F3, F4) on the pendant display.
- When loading your part, ensure that the positive X and Y axis of the working coordinate system designated in your CAM step are aligned with the machine positive X and Y axis. Positive X is right, Positive Y is away from you. Use standard good practices to load your stock like clearing ways and vise of chips use parallels etc. Note that the machine axes are the opposite from those shown on the pendant.

- When loading your stock, use soft jaws whenever possible to protect machine from accidents that can occur when a CAM path travels outside your anticipated range.
- We must now set the machine coordinate system to be the same as the working coordinate system of your CAM program.
- On the control system display select Display -> Coordinate Setup Menu -> Check Button -> Set position
- Move the spindle and table using the handwheel so that the center of your cutting tool is at EXACTLY the place where you want to set the coordinates. For example, set the center of the cutting tool to be in contact with the corner of your part that is the origin of your WCS. For air cutting (e.g. to test your programmed cutting path) set your (x,y) correctly but set Z to be -6 if your cutter is at (0,0,0). This will cause the Mitek to cut the programmed path 6 inches above your part. Note that this procedure is the cause of one of the highest sources of errors in the Mitek so it is worth exercising some care. One way to mitigate this error is to use oversized stock so that any positional errors in (x,y) are compensated for by the Mitek being able to very precisely measure control position. That way the only major source of error on tool changes is your ability to estimate where z = 0 is based on your preciseness when making tool changes and using methods to accurately locate z=0 using the paper test or something else. If you are making something which requires multiple tools or tool changes, this is the step you will return to between tools.
- To set position, enter the location of the tool into all three boxes using keyboard. All boxes must turn yellow for the positions to be accepted.

- Accept the warning
- Now is the time to transfer your G code to the Mitek. To transfer program, generate Gcode according to software. Use Vickers Acramatic post processor. Each setup/job should be own file in order to facilitate tool changes. Use only numbers to name the file, try to pick one which isn't already in use.
- Home -> Programs to view list of programs.
- If you are using Solidworks with HSMXpress, use HSM Edit open your G code and then send it using the built-in process. If you are using Fusion 360, use PuTTY.
- For Fusion 360, connect the USB to Serial converter to a port on your computer. Use the Device Manager to identify which COM port the serial converter has been assigned to.
- Open your G-code and copy it to the clipboard using a text editor.
- Open PuTTY. On the options on the left select the Serial connection type and ensure that the following options are selected: Speed: 9600 baud, Data Bits: 8, Stop Bits: 1, Parity: None, Flow Control: XON/XOFF.
- On the home screen pick the Serial connection option. Enter the COM port the USB to Serial converter is assigned to. Ensure the speed is set to 9600 baud.
- On the Mitek control system screen Home -> Programs -> Transfer Programs -> Transfer Programs In -> Select Serial -> Start Transfer.
- On your laptop, right click the PuTTY window to paste your G-code. Within 15-30 seconds you should see confirmation on the Mitek control system screen that data is being received.
- The process will automatically end with the transfer is complete. Your program will be given a systematic name that starts with a ~. If you have multiple files to transfer simultaneously (e.g. multiple setups or jobs to facilitate tool changes) you will need to use PuTTY to transfer your G-code multiple times by repeating the procedure.
- On the system control screen Home -> Programs -> Select your program -> Run Program. Your G-Code is now loaded.
- You are about to cut metal. Convince yourself that you are ready to start. Check to make sure you have coolant available, a shop vac or air pistol, that the system coordinates are set correctly to either cut your part or to cut in air, and that the thing you are about the cut is secured.
- Have hand on e-stop in case something bad is going to happen. Also be ready to dial back the feedrate or spindle speed on the pendant.
- Press Cycle Start on the pendant twice. The spindle will plunge toward your part as it moves to the first approach position in your code. This is scary looking. As the Mitek cuts your part, spray with coolant/lubricant and clear chips from time to time as required. You may need to use the knobs on the bottom of the pendant to manually adjust the feed and spindle speed.
- You may find that during the process you need to pause in order to refill coolant, assess progress or clear chips. To do so, press the "Spindle Stop" button on the pendant. This will stop the feed and stop the spindle from spinning, effectively pausing in place. Do what you need to do. To resume, press Spindle Start and then once it is at speed, press Cycle Start to resume the process. If you stop the process midway and need to restart from the beginning but are receiving an error message about not being allowed to start in the middle of a program (or a message about code having to start with a colon) use the Data Reset button on the pendant to end the program and then go to Home -> Programs -> Run Program to restart your program.
- When you are done, be 100% certain that the Mitek is not in a state that will result in it turning on the spindle or moving the table in any way. The Mitek will do exactly what it is programmed to do without deviation and can remove parts of your body with no resistance. Do not power down the machine until you have already cleaned up. Unload your part and celebrate your success.
- To clean up:
- Dismount the vise and ensure that all surfaces of the vise and the ways are clean, dry and oiled.
- Use an air pistol to free up any chips or pooled liquid which may be hidden in the T-slots.
- Vacuum up all chips and any pooled Koolmist that you see. Vacuum the rubber skirt, the vise, the ways and the tray underneath the ways.
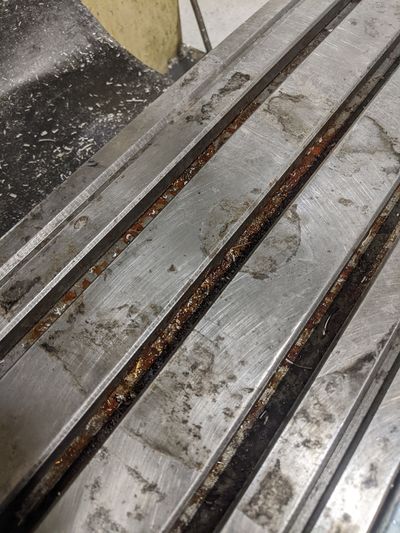
- If necessary, use the air pistol to dry any remaining liquid or push it and vacuum again. Please do this diligently, Koolmist will corrode the vise and the ways over time.
- Use ways oil to oil the entire vise and the ways including the top surfaces and the T-channels.
- Leave the vise in a different location than when you were cutting to allow any hidden coolant to air dry.
- Return any tools to their original locations.
- Use the red button (not the emergency stop) to turn off the machine control power
- Use the switch on the control cabinet to turn off the electricity to the machine
- Log out of TinkerAccess. If someone else is using a machine tool in the shop, ask them to badge in instead of cutting power to the shop.
Mitek Maintenance
Detailed maintenance procedures to come.
The auto oiler uses Mobil Vactran #2, the same oil we use for the ways.
This is what happens when the ways aren't properly cleaned and dried.
