Preparing Files With Inkscape
(Adapted from the Nottinghack wiki)
Contents
Installation[edit]
You can download Inkscape for free, which should allow you to create Scalable Vector Graphic (SVG) files, as well as export to Drawing Interchange Format (DXF).
DXF files can be opened directly in LaserCut 5.3 for use in cutting and engraving.
Setup[edit]
Some useful setup steps in your local copy of Inkscape will save you some time and trouble when bringing your files in to the TinkerMill.
Geometric Bounding Box[edit]
Inkscape is by default set up for outputting to the screen or to a printer rather than as a CAD tool for engineering, and so the bounding boxes for objects include the thickness of the line strokes. We usually want to be able to enter exact measurements for the bounding box sizes of objects that are based on the centers of the line strokes, the thickness of which is irrelevant when imported to LaserCut.
To set this behavior go to the Inkscape Preferences (Edit -> Inkscape Preferences), under the Tools section select Geometric bounding box.

Grid Setup[edit]
Inkscape by default works in pixels as the measurement; for the grids and page size.
First of all to change the grids go to the Inkscape Preferences (Edit -> Inkscape Preferences), under the Interface -> Grid section select "mm" instead of the default "px". This affects all new files, so select File -> New to open one, and go to View -> Grid to see it in action.

In addition it may be useful to have the snapping turned on for Snap to cusp nodes on the right hand side. What this will do is allow the nodes you've created (such as corners) to snap to the MM grid for more precise tuning. Usually you'll want your actual lines you're drawing to be reasonably thick to be able to see them more easily - in the Laser Cut 5.3 program they become very thin.
Document Settings and Templates[edit]
By default Inkscapes default file will be in pixels. You can change a documents units setting any time under File -> Document Properties and selecting mm instead of px for the Default units.

Once your document is set to MM it will import accurately into Laser Cut 5.3.
Usage Tips[edit]
Colored Paths[edit]
Some of the Inkscape colors are exported with the DXF which can be used to mark areas for engraving, different powers or even different orders of cut. Make sure to have the colors match across everything of one type.
Due to the limited DXF color export (it only does the 7 primary RGB colors)
These colors are:
| Color | Red | Green | Blue | Hex | Result |
|---|---|---|---|---|---|
| Black | 0 | 0 | 0 | #000000 | black |
| Red | 255 | 0 | 0 | #ff0000 | |
| Green | 0 | 255 | 0 | #00ff00 | |
| Blue | 0 | 0 | 255 | #0000ff | |
| Yellow | 255 | 255 | 0 | #ffff00 | |
| Magenta | 255 | 0 | 255 | #ff00ff | |
| Cyan | 0 | 255 | 255 | #00ffff |
You can make a palette file for Inkscape as follows:
- Make a file with a text editor, and the following content
GIMP Palette
Name: RDWorks
#
0 0 0           Layer 1 Black
0 0 255         Layer 2 Blue
255 0 0         Layer 3 Red
0 255 0         Layer 4 Green
255 0 255       Layer 5 Pink
255 255 0       Layer 6 Yellow
0 255 255       Layer 7 Cyan
- Name the file
RDWorks.gpl
- Place this file in the appropriate directory depending upon your OS:
- Windows:
%appdata%\inkscape\palettes
(note: %appdata% typically refers to \Users\<your-username>\AppData\Roaming) - OS X & Linux:
~/.config/inkscape/palettes
(note: ~ refers to the user's home directory, typically /home/<your-username> on Linux or /Users/<your-username> on OS X)
- Windows:
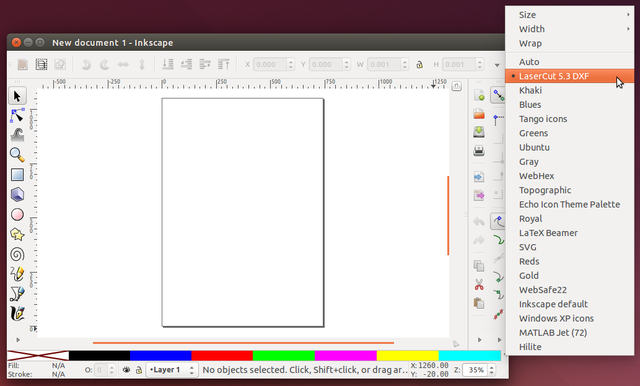
- Once you have copied the palette into the correct location, restart Inkscape if you have it open and then click the small arrow to the far right of the bar of colors at the bottom of the screen. This should pop up a list of alternative palettes to use, you should see a new one what we just installed.

Area fills and Layers[edit]
You can fill-color in areas (eg; to show engraving areas) which makes things easier to see, and use layers and transparency to show/hide or overlay different areas. These are all collapsed or ignored when exporting to DXF, which is useful.
Area fill color also helps determine if a path you've created is really a completed one. A good engrave area is a fully contiguous single line which is joined up to itself, although the DXF export splits the continuous line into one line with two end points which is easily fixed in Laser Cut.
Paths only![edit]
When finishing a file ready to export select the entire document and go to Path -> Object to Path. The only thing a laser understands is paths (lines) and this may catch any you missed if converting an image file over; objects are not supported.
Color by Layer[edit]
After selecting an object or path you can use the right click menu to "Select same" and then choose the "Stroke color".
Then you can right click (one of the selected items) and choose "Move to layer" to select an appropriate layer.
All selected items will be moved to the corresponding layer, making it easier to separate out the different colors for logically separating out different engrave, fast-cut or cut settings.
Layering Order[edit]
LaserCut reverses the order of the layers when it imports a DXF file. NOTE: This effect doesn't seem to occur when the "Save a Copy" option is used to generate a DXF. It seems to consistently apply if the "Save as" option is used to generate a DXF. Be aware that this changes the current open file in Inkscape to the DXF version, so any changes made will not automatically be added to the SVG version (Inkscape will prompt you to save as SVG when you close the file).
So, if you have the following layers set up in Inkscape, with each colored stroke assigned to it's appropriate layer, when you save the drawing to a SVG:

They will be reversed to this order in LaserCut:

This can be useful to "pre-set" the engrave, fast-cut and cut layers for importing; especially when using the full 7 colors that LaserCut supports importing from a DXF (mentioned above).
Overlapping Lines[edit]
If cutting two objects that share a common line (e.g. two squares side by side) it's possible to remove one of the overlapped lines using the "Edit Nodes" tool in Inkscape. This prevents the Laser Cutter from tracing and cutting the same line twice, and is a little bit more efficient (or a lot more, depending on how many overlapping lines there are).
It may be a good idea to remove these overlapping lines in the DXF copy of your file so any movements or changes in the SVG in future will not need lines to be re-added.
Tabbed Box Maker[edit]

There are Inkscape extensions that allow you to generate paths for tabbed boxes.
- TabbedBoxMaker (0.93)
- Download Boxmaker.inx, Schroffmaker.inx and Boxmaker.py and put them in the Inkscape extensions folder generally in:
- Windows:
\Program Files\Inkscape\share\extensions
- Linux:
/usr/share/inkscape/extensions
- Windows:
- Download Boxmaker.inx, Schroffmaker.inx and Boxmaker.py and put them in the Inkscape extensions folder generally in:
Tip:
- Use inside measurements to fit something in, and outside measurements to make the extremities of the box a specific size, based on the material thickness.
- Use millimeters and use the MM thickness of your wood the Material Thickness box (defaults to 3mm). This affects tab size and the inside versus outside size changes.
- The cut width of our laser tends to be around 0.1mm (which is the suggested default).
- The tab width defaults to 10.000 - so a reasonable 1cm. Put a larger value in for bigger (but fewer) tabs, useful on longer edges.
DXF file export settings[edit]
- Select the entire document and go to Path -> Object to Path.
- File -> Save As Copy to do an "export" to DXF:

The DXF file exports:
- Paths (lines created in your file)
- Colors of paths
It will exclude:
- Embedded images
- Layers
- Transparencies
- Fills
Use the following options when saving to DXF format:

Your file can now be opened in LaserCut 5.3 by using File -> Import.